Pallet Projects Diy Easy Corn Hole Board


Do your kids need a fun bean bag toss game to play in your yard this summer? With these instructions you will learn how to make custom cornhole boards from one pallet! Really budget friendly! Build your kids these small-size DIY cornhole boards so you can each enjoy your own cornhole board game at the same time!
Build more outdoor fun: Yard Dominoes – Yardzee Dice Game – Regulation Cornhole Board Plans

How to Make Kid-Sized Set of Cornhole Boards from a Pallet and the Bags to go with Them
by Tamara from Provident Home Design
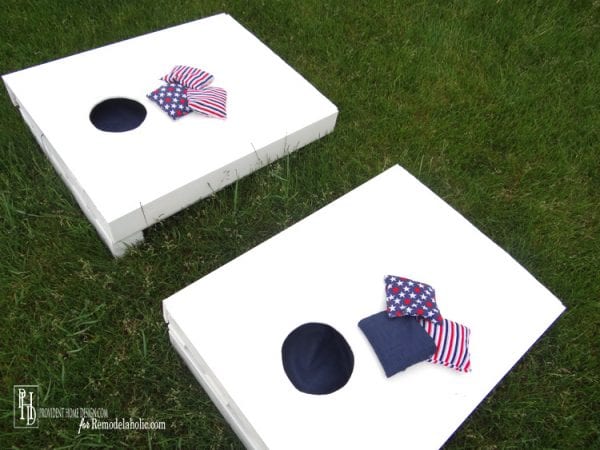
At the smaller size (24″ x 32″), I made two cornhole boards out of 1 pallet. I used the pallet for the main frame of the boards.
They are perfect for kids just in your backyard, but also for family reunions, birthday parties, and class parties at school. Bonus: they're easier to store than regulation cornhole boards!
If you have two pallets, you can make cornhole boards to regulation cornhole size (48×24) as set by ACO. Follow the tutorial below, adjusting to the different size as needed. To build legs at regulation height, refer to How to Make Cornhole Boards tutorial.
Common Questions
Is it cheaper to make your own cornhole boards?
Yes, if you have most of the supplies laying around the house from left over projects then I would say, Yes, you can definitely make them cheaper than buying them at the store.
How thick of plywood do you use for cornhole boards?
We only used 1/4″ thick for these smaller boards. If you where doing a bigger size than I would use 3/4″
What is the best material to make cornhole boards out of?
A Smooth plywood works the best so the bags slide well into the hole. If you use a rough plywood the bags wouldn't slide as well and could get stuck in cracks.
Tools and Supplies Needed
- Jigsaw
- Drill
- Drill bit set
- Miter Saw (optional)
- Circular Saw (optional)
- 6″ Hole Saw (optional) and would have really been nice to have.
- Pencil
- Measuring Tape
- (1) Pallet 32″ x 48″
- (1) 4x4x6
- (1) 1/4 inch thick 4×4′ piece of plywood
- (1) 12 ft 4.5 inch wide piece of molding (I used a simple baseboard molding)
- 1.5 inch wood screws
- 1 inch finishing nails and tool to use them – nail gun or punch
- 100/120 Grit Sandpaper
- Orbital Sander (optional)
- Spackling (optional)
- Paint or Stain (optional)
How to Make a Set of Cornhole Boards From a Pallet
1. Measure and Cut Pallet
Measure and mark your pallet where you will be making your cuts.

My pallet was 32″ x 48″. Using a jig saw, I cut the pallet into two 32″ x 24″ pieces (as shown below).

2. Measure and Cut the 4×4.
Now measure and mark the 4×4 to the width of the pallet. Since the width of each cut pallet was 24 inches I cut my 4×4 into two 24 inch pieces. I used a miter saw for these cuts, but use what you have.

3. Screw Each Pallet Piece and 4×4 Piece Together
Place the 4×4 under the cut pallet and screw the bottom pallet boards to the 4×4 (as shown below). This 4×4 will give it the correct angle for the game and hold the pallet frame together,


4. Remove Sections of Pallet
If there are boards where the scoring hole will be, cut the boards off, leaving the ends in place. You can see where I did this below.

5. Trace and Cut Plywood
Turn the "cornhole skeletons" face down onto the plywood. Trace around the body of each of them and then cut along the traced lines with a jig saw. You could also use a circular saw here if you have one.


6. Nail Plywood Pieces to Each Top
Place the cut out plywood onto their respective "cornhole skeletons" and nail it into the top and bottom boards (along where the arrows indicate). This is where a nail gun would come in handy if I had one. Screws can be used as well to hold it on better.

7. Cut Molding and Attach to Left and Right Sides of Each Board
Measure and mark the side moldings to the length of the sides of the pallet. My dimensions were 32 inches so I cut (4) 32 inch pieces.

Nail the side moldings into the ends of the boards. Again nail gun would have been nice to use here.

8. Cut the Hole
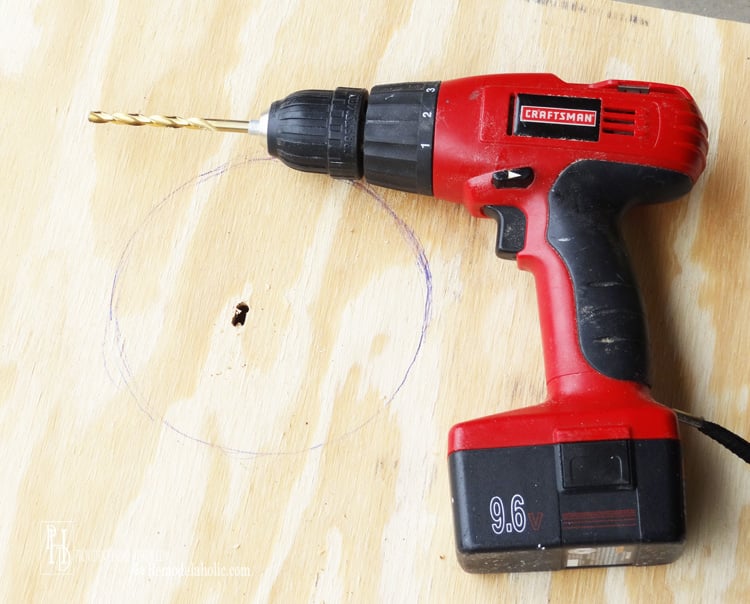
Find the center point of the hole, about 9″ down from the top and centered from sides, then trace around the lid of a standard paint can (or around anything that is 6 inches in diameter) making sure that it is centered to the board. You could also use a 6″ Hole Saw if you have access to one.

Then using a 1/4″drill bit or bigger, drill a hole in the middle of the circle large enough to fit the jigsaw blade in. With the jigsaw, cut out the traced circle. Sand the edge of the circle after it is cut out to prevent scratches or slivers in players' hands.

9. Sand the boards, fill in the gaps, paint
Sand the cornhole boards as much as you feel is sufficient. Start sanding with 100 grit sandpaper then work up to 120 grit. I also chose to fill in any gaps between the top plywood board and side boards using spackle and a putty knife. you could also use wood puddy as well to cover the holes. You could paint the board with a primer as a base coat if you wanted. Then I painted the whole thing white but you can paint or stain it to your heart's content!

Voila, your cornhole boards are done! I laid a navy blue piece of fabric inside the cornholes for aesthetics and so the players won't get splinters when they retrieve the bean bags.


Want some fun bags for your small cornhole set?
How to Make Bean Bags for Your Cornhole Game
Typical cornhole games require a total of 8 bags in 2 different colors, but the great thing about DIY is that you can make any number of bags in any colors or patterns you want!
Supplies for making Cornhole Bags:
- Woven Fabric – Any kind of woven (not knit) fabric will do.
- Cotton and cotton blends are easy to work with and come in fun patterns. These fabrics are usually 45 inches wide, so you can make 3 bean bags for every 7 inches you buy.
- Heavyweight options (for durability) are also easy to find at any fabric store. These fabrics are usually closer to 60 inches, so will make 4 bean bags for every 7 inches you buy.
- Matching Thread
- Sewing Machine
- Beans or plastic corn pellets
Directions for making cornhole bags:
1. Cut Squares of Fabric
For each bag, cut out two 6.5 x 6.5 inch squares of fabric.

2. Place 2 Squares Together
Lay two squares together with top sides (right sides) facing each other.

3. Sew Squares Together, Leaving Gap, and Turn Right Side Out.
Note: For durability, you may want to use a small zig zag sewing stich or double stitch all seams.
Start at one corner and sew together leaving 1/4 inch allowance on the sides.

Leave 2 inches unsewn and turn the fabric right side out by pushing the inside fabric through the 2-inch hole.

4. Fill the Bag with Dried Beans and Sew Shut
Stick the end of a funnel through the hole in the bag and drop dried beans through the funnel and into the bag. You could also use plastic corn pellets if don't want to use beans. Fill the bag 90% full then tuck the unfinished edges into the bag and sew the 2-inch hole shut.

And now it's time to play cornhole!
We've had a blast with this set of cornhole and hope you do too!
Find more great projects from Provident Home Design here on Remodelaholic such as adding trim above the mantel, a DIY pedestal side table, and a no-fail tutorial to creating your own abstract painting.
Complete the backyard fun with more from Remodelaholic:
- Build a bigger Regulation Size Cornhole Board Plans
- Fill a DIY caddy with drinks and treats for portable snacking
- Build a patio table with built-in coolers
- Get wet: Water Fun: Summer Activities for Kids
- Play hard! How to Build Your Own American Ninja Warrior Training Course
- How to Build a Fire Pit
Please pin this!

Originally published 06.22.2015 // Updated 03.22.2021
Source: https://www.remodelaholic.com/diy-cornhole-set-pallet/
0 Response to "Pallet Projects Diy Easy Corn Hole Board"
Post a Comment